Recipe: Popped Blueberry Pie

I’ve been waiting 5 years to make this pie…  5 YEARS!  Considering it’s 4th of July and Kyle just finished the Peach-Ginger Pie I made 3 days ago I figured today was the perfect day to make a pie.  Might as well make it the one I’ve been wanting forever.

I’ve never been a huge fan of blueberry pie.  It’s always mushy and runny or too thick and gummy.  Its really hard to get it perfect so I never even bother with it.  But 5 years ago Kyle and I were eating at a random restaurant in New Jersey and I had a side of blueberry pie that blew my mind. It was a mixture of cooked and fresh blueberries set in a pie crust.  Genius!  The best of both worlds.  The strong, deep flavor of a cooked blueberry and the snap and texture of a fresh blueberry.  My mouth is watering just thinking about it.

Then life got busy (I moved to DC) and kinda forgot about the blueberry pie perfection.

So here I am, finally making this pie, recording the recipe as I go so that you don’t make the same mistake as me.  Don’t wait 5 years to make this pie!  Trust me, it’s more than worth the tiny amount of effort it takes to make it.

I decided to make a deep dish pie because I wanted to consume as much as possible so the recipe below is a bit bigger than usual. It’s enough for 2 deep dish pies because when I make pie I always make extra dough so the next time I want pie I’ve only got filling to worry about.  I’m using a 10″ deep dish pie pan.  An 8″ springform would work in the same way if you’ve got one of those, you just might need to blind bake a little longer.  If you are doing this in a traditional 9″ pie crust you can make a half size recipe.  Any excess dough you can turn into hand pies or something yummy.  I’m sure no dough will go to waste.

RECIPE

CRUST
2 deep dish single crust pie shells- for one pie make a half recipe or save the other half refrigerated up to one week or frozen up to 1 month.

5.75 cups AP Flour
2.5 tsp salt
15 ounces cubed and chilled (almost a full pound)
1/3 cup ice water
2.5 TBPS chilled vodka

1 egg whisked

DIRECTIONS

1) Mix together dry ingredients in a large bowl. Add butter and use hands or forks to cut butter into the flour. Keep going until the butter is no longer viseable but stop before the dough starts to come together. Alternatively you can use a stand mixer with a paddle attachment to cut the butter into the flour but keep it on a low speed and don’t let it overmix

2) Add the chilled water and vodka and use hands to bring together into a dough. If it seems a little dry add more water ¼ tsp at a time up to 1 tsp.

3) Divide into 2 packets and allow to rest at room temperature (yup, you read that right, room temperature) 1-6 hours.  For this recipe you will need 1 blind baked shell.  If you have extra dough you can wrap and reserve refrigerated up to 1 week and frozen up to one month.

4) Roll out the 1/2 dough to fit your pie pan.  Place in the pan and dock the bottom with a fork.  Decorated edges as desired and chill for 30-45 minutes.  Blind bake at 400 degrees for 15 minutes then remove the weights, re-dock, and bake an additional 6-8 minutes or until done.  Remove from the oven and brush with whisked yolks immediately to create a seal.  This will keep the crust from getting soggy.  Reserve until ready to fill with blueberry.


FILLING

5 pints (10 cups) blueberries, fresh and hopefully local, divided
2 lemons zested
1/4 cup lemon juice
1/4 cup water
5 TBSP cornstarch
1/2 cup sugar (or more to taste if you prefer sweeter, up to 3/4 cup)
1/2 tsp vanilla extract

DIRECTIONS

1) Place 3 cups of blueberries in a pot with water, lemon juice and lemon zest.  Bring to a simmer for 5-6 minutes.  Turn off heat.

2) In a bowl combine the sugar and cornstarch.  Whisk to combine.  Add slowly, while whisking, to the burberry syrup.  Return to a medium temperature and allow to return to a simmer, whisking the whole time to keep it smooth and prevent scorching.   The mixture will become VERY thick like pudding.

3) Place half the remaining uncooked blueberries in a large bowl.  Pour the hot blueberries over them and stir to combine.  Cover with syran wrap and allow to sit for 15 minutes.

4) After 15 minutes has passed add the rest of the blueberries to the mixture and stir to combine.  This will give 3 textures of blueberries, fully cooked, partially cooked and fresh.  Make sure everything is evenly coated.  Soon the blueberries into the pie crust (its okay if its still hot) and gently press down tightly.  Decorate as desired (or not at all.)  I like to serve it with whipped cream although a pre-baked Oatmeal Streusel Topping sprinkled on top while the filling is still warm would be delicious too!


This slideshow requires JavaScript.


Recipe: Peach-Ginger Pie

When people say “You and your husband are both chefs? You must eat so well at home!” I just have to laugh.  Cooking is the love of my life but after doing it at work all day every day we usually order take out and relax on our day off.

But lately things have been different for me…

Having recently stepped down from my position as executive pastry chef with Neighborhood Restaurant Group I find myself with an uncontrollable need to cook at home.  Whether it’s a favorite classic dish I’ve been making for years or something new I’ve never done before I am LOVING this new found love of my home oven.  And I can’t think of a better time of year to play with food.  Summer brings some of my favorite fruits and veggies.  Sweet corn ice cream, Sour cherry scones and my favorite so far this week: Peach-Ginger Pie.  Absolutely loved making and eating this.  Kyle even had a giant slice for breakfast the past 2 days.  I should be careful though…  He might get used to this!

I used my trusty all butter, vodka pie crust, (found here) but feel free to use your favorite recipe.  Just make enough for a double crust pie.  If you use my recipe from the post a half batch will be enough for one double pie crust, (correct size shown below.)

RECIPE

CRUST
4.5 cups AP Flour
2 tsp salt
3 sticks butter (12 ounces cubed and chilled)
1/4 cup ice water
2 TBPS chilled vodka

1 egg for egg wash during assembly
3 TBSP Raw Sugar

DIRECTIONS

1) Mix together dry ingredients in a large bowl. Add butter and use hands or forks to cut butter into the flour. Keep going until the butter is no longer viseable but stop before the dough starts to come together. Alternatively you can use a stand mixer with a paddle attachment to cut the butter into the flour but keep it on a low speed and don’t let it overmix

2) Add the chilled water and vodka and use hands to bring together into a dough. If it seems a little dry add more water ¼ tsp at a time up to 1 tsp.

3) Divide into 2 packets and allow to rest at room temperature (yup, you read that right, room temperature) 1-6 hours.

FILLING

2.5-3lbs / 7-8 Ripe Peaches (I prefer yellow for their flavors but white will work as well)
3/4 cup sugar (amount depends on tart the peaches are)
Zest of 1 lime
Juice of 1-2 Limes (2 TBSP)
1 tsp salt
1/2 tsp ground cinnamon
2.5 TBSP sugar free pectin (If you can’t find this use 2 tsp cornstarch in it’s place)
2 TBSP cornstarch
1 tsp fresh grated ginger
3 TBSP diced candied ginger

DIRECTIONS

1) Bring a 4 qt pot of water to a boil.  Cut an X in the bottom of each peach and plunge into water, fully submerging, for 30-45 seconds or until the skin begins to peel off.  Use tongs to remove the peaches from the boiling water and place directly into ice water to stop the cooking.  Once this is done with all the peaches remove from ice water and peel the skins using a knife.  They should come off easily. Cut each peach into 24 wedges and place in a large bowl

2) add to the large bowl 1/2C sugar, and cinnamon.  Allow to site 60 minutes. After 1 hour has passed strain the liquid into a small pot.  In a small bowl combine pectin and remaining sugar (use between 2TBSP and 1/4 cup sugar depending on how tart the peaches are.)   Add the sugar/pectin mixture to the pot and bring to a simmer to thicken, whisking to avoid scorching.

3) Sift cornstarch over the peaches and toss with the candied and fresh ginger.  Add the hot sugar syrup mixture.

ASSEMBLY

1) Preheat oven to 400 degrees (convection) or 435 degrees (still.)  Roll out one piece of dough to about 1/4 inch thickness.  Line the bottom of a 9″ pie pan with the dough.  Allow a bit of overhang so you have extra dough to work with.

2) Whisk the egg with 1 TBSP water to make egg wash

3) Fill the dough with the peach pie filling, you may have a little extra depending on the exact dimensions of your pie pan.  Roll out the 2nd piece of dough to the same thickness and cut out any decorative pieces from the dough, (I did circles.)  Brush a bit of egg wash onto the bottom crust then place the 2nd piece of dough on top of the pie, pressing to gently seal the two pieces of raw dough.  Use a pair of kitchen shears or a sharp pairing knife to cut the edge of the crust to the size you want it.  Crimp and shape edges as desired.  Lightly brush with the egg wash and sprinkle with raw sugar.  Be careful not to let the egg wash pool or it may burn.  A very light brush should do it.

4) Place the pie on a shelf set in the bottom 1/3 of the oven.  Bake for 20-25 minutes or until crust begins to brown.  Turn oven down to 350 degrees and bake an additional 25-40 minutes or until the pie is bubbling and the color is a beautiful golden brown.  You may want to place a tray under the pie the last 15 minutes to catch any juices that bubble over.

5) Cool at least 2 hours before slicing and serving.  Store covered at room temperature up to 3 days or covered in the refrigerator up to 5 days, although I doubt it will last that long!


This slideshow requires JavaScript.

Happy Friday, Doughnut Edition!

Usually “Happy Friday” is followed by a photo of a cake but this week is different… It’s National Donut Day and although I’m kinda over silly food holidays in my humble, doughnut loving opinion, this one can stick around.

Thought I’d take a quick sec to share my recipe for beignets. They are a simple yeast risen doughnut that you top with powdered sugar and eat hot. I mean, you can eat them at room temperature a few hours later too but who are we kidding. Doughnuts right out of the fryer never last that long. And there’s almost nothing more satisfying than a freshly fried doughnut!

RECIPE

Ingredients:

1/2 ounce dry yeast
3/4 cup warm water (slightly above body temp)
Pinch sugar

3.25 cups flour
1/4 cup sugar
1/2 tsp salt

1 large egg, beaten
1/2 cup evaporate milk
1 TBSP shortening or butter

Directions:

1) Bloom yeast in water with the pinch of sugar. Do this by whisking together then setting aside for 5-6 minutes or until foamy. Combine with milk an egg.

2) Place the flour, sugar and salt in the bowl of a mixer fitter with the dough hook. Add the milk/yeast mixture and knead on low to combine. Add the shortening in 3 little pieces and turn to medium. Knead 6-8 minutes or until smooth.

3) Place dough into a bowl that has been sprayed with PAM. Cover with plastic and let double, about 45 minutes

4) Lightly flour a surface. Roll the dough about 1/4″ thick. Cut into desired shape. I like rectangles that are about 2″ x 3″ because I stretch them slightly larger before frying. Allow to proof 15-25 minutes or until they are about 50% bigger.

5) Heat oil or shortening to 325 degrees. Fry 3-4 pieces at a time for about a 60-90 seconds per side, or until golden brown. As you place them in the fryer gently stretch them out the slightly deflate the middle or you’ll have a doughnut with a big center. After you get the first one remove from the fryer for 2 minutes then break open to test for doneness. The last thing you what is to fry all your beignets and have them be under done in the center.

6) Remove from fryer, place on a paper towel to drain for a few seconds then throw into a bowl of powdered sugar. Toss to coat and devour as soon as possible

20140606-153401-56041073.jpg

20140606-153400-56040327.jpg

20140606-153358-56038807.jpg

20140606-153359-56039249.jpg

20140606-153358-56038354.jpg

#PastryProblems

Last week I read “Why this is the Dark Age of Desserts” by Adam Platt and it was the first time in a long time that I had such a visceral reaction to an article.  I spent the day reflecting on my career choices, going through a bit of an emotional roller coaster.  All spurred by Platt’s take on the current state of sweets in restaurants.  I felt like I was grieving for a job that, at times, feels like it defines me.

My first reaction was complete denial. “This is ridiculous!”  (I might have used a four letter word other than ridiculous but you get the drift.)  “He’s just doing this to get attention, right?”  I mean how could it be true?  All I could think about was all the passionate, talented pastry chefs I have worked with and around throughout the years.  And the talented pastry chefs whose desserts I have not just enjoyed but bene inspired by.  People like Jenn Yee at Lafayette, who is turning out stunning, delicious desserts and confections using what seems like every technique that exists with a level mastery I’ll always be envious of.  And Brooks Headly, who redefined the way I looked at desserts in just a few bites.  There is no way this article could possibly be right, right?  Not with chefs of this caliber representing us…

Yes, of course there are lots of bad dessert out there, I’ve had my fair share of disappointments at the end of a great meal.  But I’ve had just as many unseasoned appetizers, poorly composed entrees and generally bad meals that cost a pretty penny. I can even remember a time or two where the desserts saved the meal, convincing me to give a restaurant another shot when the first experience was less than extraordinary.

But after thinking about what Platt said all day, and reading the article about a dozen times, I had to finally accept that he’s right.  As much as I want to defend my craft, almost as if this article was a personal attack against me, I know there is a lot of truth to it. For more reasons than I can count on both hands pastry is, generally speaking, the lowest on the list of necessary restaurant components.  I’m not talking about the actual desserts, every restaurant has those, I’m talking about pastry as a driven department rather than an afterthought; as a priority, not an inconvenience.

And I get it.  It’s impossible to quantify what a pastry department does for the business.  Great desserts require talented hands to develop them, prepare them, and plate them. You rarely make your money back on a pastry chef let alone a department even if that “department” is only a chef and an assistant.

But how do you put a dollar value on the excitement of a guest when that dessert that was designed, prepared, and plated by those talented hands is placed in front of them?   Or the joy warm, fresh bread can bring to the beginning of a meal.   Or the reaction to a bite of ice cream so smooth and rich its unlike anything they’ve ever tasted.  I like to think those experiences are worth something.  Or even a lot.

So I guess the question is, “where do we go from here?”

We accept the issues and learn to overcome them.  Make ourselves as valuable as possible by being more organized, more efficient and being more about the bottom line of the business than we ever have before; to the point where a chef or restaurant owner feels like they’d be crazy not to have you on their team.  Train under great chefs longer, as a pastry cook, before taking the title of Pastry Chef.  Looking in the rear view mirror at my career I realize now that I wish I had taken more time studying.  And, of course, we must focus on the desserts we serve.  Being a chef is a balancing act.  You need to execute a menu that satisfies your passion to create, while ensuring the experience of the guest is always the main priority.  Many times I’ve eaten desserts that left me with mixed feelings.  First excited that the pastry chef tried a cutting edge technique or an “interesting” flavor profile. Then disappointed that I had to eat it.  If you take away the thrill the guest gets from ending the meal on a perfect note then don’t be surprised when the popular combination of a prep cook/garde manger cook might replace you.  They can make moderately satisfying desserts too…  At a much lower salary.

Nothing can be perfect 100% of the time. We all have hits and misses in this business.  But we have to get better at being indispensable or what little opportunity we have to create and contribute will, understandably, continue to shrink.  This is exactly the kind of article that should inspire a pastry chef to be better tomorrow than they were today.  Yes, it’s hard to think about working harder but as I always tell my interns and assistants when I can tell they are feeling frustration from the time it takes to truly understand our craft, “if what we did was easy and everyone could just do it then it wouldn’t be nearly as special to be a part of it.”  Chefs thrive on long hours, intense work and a constant uphill battle… And I’d be pressed to come up with something I’d be more willing to climb mountain to save. Yes, to some it’s just a few sugary bites at the end of a meal but to a pastry chef it’s so much more.  I know for me it’s not just a career but the career I’ve built my life around.

Happy Friday!

At BIJOUX we love weddings but the cakes for  engagements, birthdays and other parties can be just as fun to create!  The only thing we loved more than this trio of cakes and dessert spread was the bat mitzvah girl herself.  And we had the fun challenge of recreating her invitation, which had a 3-D multicolor flower on it.  The flowers on the cake ended up turning out so perfect they thought they were made of paper.  It was a total success!

This slideshow requires JavaScript.

We LOVE Baltimore!

My husband, Kyle, and I are super busy.  That’s not a complaint, that’s a fact.  We both have multiple kitchens to run and find it easy to get so caught up in managing kitchens and cooking that we forget to look outside of our day to day for inspiration.  Surprisingly, a trip to Baltimore was just what we needed to refresh our outlook on food and service.  Not a relaxing trip, a cooking trip.

If you live in or around Baltimore, or into food at all, then you are probably familiar with Spike Gjerde and his flagship restaurant Woodberry Kitchen.  Kyle and I are huge fans, having made the hour plus drive to dine there many times, so we immediately said “YES!” when we were offered the opportunity to take over the kitchen of his cafe, Artifact Coffee, for three nights.  Kyle and I showed up to Baltimore with the fun task for cooking for 150 people each night, serving a comfort menu of warm biscuit sandwiches and pie.  We collaborated with Woodberry Kitchen on some of the toppings, like using their snake oil hot sauce to make our buffalo sauce or their pickled kohlrabi to make our kohlrabi slaw.  We also sold nearly 1,000 doughnuts from GBD on Friday morning.  It was great!  And Hannah and Alison, the front of house dream team Spike has assembled, really brought our vision to life in such  perfect way.  Gingham pick nick table cloths, Alice and Chains playing all night, beer and punch for cocktails.  It was pretty much perfect in every way.

What we expected was a fun time, which is was.  But we also found the challenge of cooking in a new kitchen, coordinating everything and working with a new team of total pros to be rejuvenating.  I went back to work Monday with new ideas and a lifted spirit.  Funny how in this business a change of pace can be just as refreshing as a vacation in some ways.  I think that’s how I know I love what I do!

This slideshow requires JavaScript.


Recipe: Bûche de Noël

In keeping with our gingerbread theme (tis the season, right?) I thought I’d use this post to share two special things with you. Step by step photo instructions on how to assemble a Bûche de Noël AND my recipe for gingerbread cake.

This technique can be applied to most, but not all, cake recipes. You need a somewhat tender cake to be able to roll it into the log. Traditionally a light sponge cake is used but I prefer a slightly more dense, moist cake. You can use my buttercream recipes or your own. I would just recommend homemade, not store bought, buttercream only because store bought brands tend to be really soft. My included recipes have a little more structure.

The gingerbread cake recipe is one of my favorite things about the Christmas season. It makes great cupcakes too. If you are really feeling fancy you can check out my instagram video demos on how to dress up your cupcakes for the holiday! Fill your cupcake liners a little more than half way with the batter if you decide to go that route.

Gingerbread Bûche de Noël

What you’ll need:
Gingerbread cake
Egg nog buttercream
Chocolate buttercream
Decorations (meringue or fondant holly and mushrooms)

Recipe:
Gingerbread cake
1 ½ + 1/3 c. AP flour
2 tsp. BS
2 tsp. ground cloves
¼ tsp. ground cinnamon
Pinch salt
3 oz. butter
½ c. dark brown sugar
½ c. molasses
1 egg
1 ½ plus 1/3 c. Hot water

Directions:
1) cream butter and sugar until lightened (about 5-7 minutes in medium high) be sure to to scrape the bowl once or twice
2) combine egg and molasses and pour in slowly while mixing. Mix to combine then scrape the bowl
3) sift dry ingredients and add alternating with the hot water in 5 additions, beginning and ending with the dry mix (dry, wet, dry, wet, dry)
4) line a brownie pan with parchment and spray with non-stick spray. Spread the batter into the pan evenly and bake at 325 degrees F until done (15-22 minutes depending on the oven)
5) reserve at room temperature until needed

Recipe
Eggnog Buttercream
5 oz. butter, softened
7.74 oz or 1 c. powdered sugar, sifted
1 tbsp. milk
1 tbsp. dark spiced rum
¼ tsp. grated nutmeg
1/8 tsp vanilla extract

Directions:
1) place butter and sifted powdered sugar into a bowl with the paddle attachment and cream on medium high for 5-7 minutes or until light and fluffy. Scrape the bowl at least once
2) combine milk, rum and nutmeg. Slowly pour into bowl while mixing the continue to mix on medium high until fluffy, 2-3 additional minutes, scraping once or twice
3) reserve until needed

Recipe:
Chocolate Buttercream
13 oz dark chocolate (63-72%)
14.5 oz butter, softened
10 oz or 2 c. powdered sugar, sifted
1/4 tsp vanilla extract

Directions:
1) place chocolate over a double boiler and melt. Reserve warm but not hot
2) place butter and powdered sugar in a mixing bowl fitted with the paddle attachment and cream on medium high 5-6 minutes, scraping at lest once
3) with the mixer running drizzle the warm chocolate slowly into the buttercream until completely combined. Add vanilla extract Scrape the bowl and mix on medium-high 1-2 additional minutes. Reserve until

To Assemble the Bûche de Noël:
(Additionally, see the pictures for a step by step visual demo featuring my lead decorate Alexandra Mudry)

1) Flip the cake out of the pan onto a piece of wax or parchment paper that has been sprayed with non-stick spray. Peel the parchment you baked the cake on off the back of the cake.
2) Top the cake with a 2nd piece of sprayed parchment and roll gently with a rolling pin until about 1/8-1/4″ thick. Remove the top piece of parchment.
3) Spread the eggnog buttercream over the cake to all edges.
4) Use the parchment paper to start rolling the cake up. Don’t worry too much about breaks in the cake, jut use your hands to keep pressing the cake into a tight log
5) Refrigerate or freeze the log for 30 minutes
6) At an angle cut about 3″ of cake from both ends of the cake. Place them onto the log, flat edge attached to the cake with chocolate buttercream (see photos for visual instructions)
7) Cover the cake in a fairly thick coat of chocolate buttercream, taking your time to get into all the creases.
8) To create the “bark” texture use a fork, pulled along the buttercream with the tines of the fork pressed about 1/8″ into the buttercream. Go in straight lines and sometimes at angles/in circles to create knots in the “bark”. Don’t stress too much, it’ll look crazy at the beginning but once the whole log is covered it’ll come together (see photos for visual instructions)
9) Use an offset spatula in a circular motion on the 4 flat edges of the cake to create the look of a cut edge of a log.
10) decorate with hand made or store bough meringue or fondant mushrooms or holly. This cake cane be made up to 2 days in advance. Store in the refrigerator and place at room temperature at least 4 but up to 12 hours before serving.

This slideshow requires JavaScript.

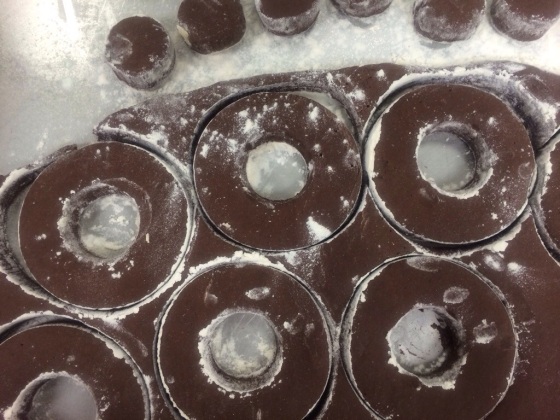
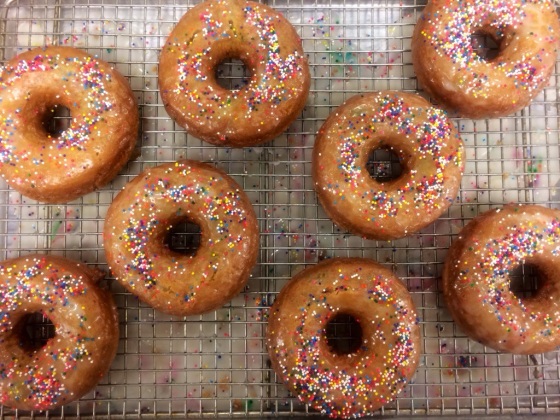
Recipe: Gingerbread Doughnuts

There is almost nothing that says Christmas more than the flavor of molasses, brown sugar, fresh ginger and spices.  I’ve found lots of ways to incorporate those flavors into all kinds of different desserts, some traditional and some not so traditional.  Cake, cookies, marshmallows, ice cream, panna cotta, rice krispies.  All are great vessels for the warm, dark, spicy blend.

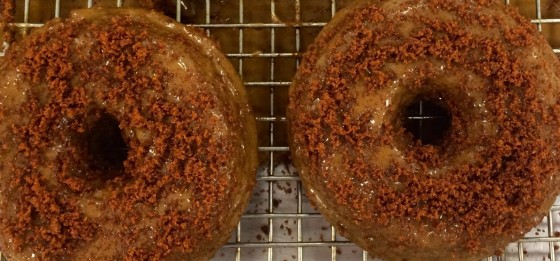
This year we added doughnuts to the list of holiday indulgences.  A moist, dense cake doughnut infused with all the familiar gingerbread flavors.  I liked it so much I thought I’d share the recipe.  Imagine sipping hot cocoa and eating a warm gingerbread doughnut while you open gifts Christmas morning…  Yes please!

Gingerbread Doughnut Recipe (yields 9 doughnuts):

  • 3.5 cups (525 grams) All Purpose Flour
  • 2.25 tsp (10 grams) baking powder
  • 1 tsp (6 grams) baking soda
  • 1 tsp  (2 grams) cinnamon
  • .5 tsp (1 gram)  salt
  • 1.5 tsp (3 grams) powdered ginger
  • 5 grates nutmeg
  • 1/4 cup (56 grams) butter
  • 3/4 cup (163 grams) granulated sugar
  • 1/4 cup (50 grams) dark brown sugar
  • 2 each large eggs
  • 1/2 cup (127 grams) buttermilk
  • 3 TBSP (71 grams) molasses
  • gingerbread glaze (recipe to follow)
  • 1/2 cup pulverized gingersnap cookies

Directions:

  1. Cream butter and sugars in a stand mixer fitted with a paddle attachment until smooth.  Scrape bowl twice
  2. add eggs and yolk, one at a time, scraping the sides of the bowl between each addition
  3. add molasses and buttermilk slowly while mixing. Scrape the bowl making sure everything is evenly incorporated
  4. Combine dry ingredients in a bowl.  Add to the mixer and mix to combine
  5. Scrape dough onto a piece of plastic wrap.  Pat into a square (about 6″ square) wrap and refrigerate at least 4 hours or to overnight
  6. Heat fryer oil to 325 degrees
  7. Dust a counter with flour. Roll the dough to about 1/2″ thick, or a 10″ square.  Use a round cookie cutter to cut 9-10 doughnuts.  cut holes.
  8. drop doughnuts gently into the fryer, 2 at a time.  once they float to the top of the oil fry for 1 min 30 sec then flip and repeat on the 2nd side.  Remove from oil and place on a cooling rack. Coat with glaze and immediately dust heavily with ground gingersnap crumbs.  Repeat with the other doughnuts, allowing the oil to return to temperature between each batch.  Serve warm

Gingerbread Glaze Recipe

  • 8 ounces (226 grams) powdered sugar
  • 3 TBSP molasses
  • 3 TBSP ginger juice (or 4 TBSP fresh ginger grated on a microplane)
  • 2 tsp water
  • pinch cinnamon
  • 3 grates nutmeg

Directions:

  1. sift powdered sugar
  2. Add all other ingredients and whisk smooth
  3. use immediately or store, covered, up to 3 days.  Stir before using

This slideshow requires JavaScript.

Recipe: Sausage-Cheddar Quiche

I. Love. Brunch…  A lot.  The bad news is I hardly ever get to go to brunch because I end up working every Sunday. The good news is I get my brunch fix tasting everything while I’m working.  It’s a win win!

One of my favorite brunch items is quiche.  A flaky crust and silky custard is the perfect foundation for almost any filling.  Seriously.  I’ve done everything from classic spinach-parmesan to smoked salmon-goat cheese.  Once you get the basics of the crust and custard you can mix almost anything into them.  It’s that easy!

Today I’m sharing a recipe for a simple but delicious sausage-cheddar quiche.  At Buzz Bakery we make our own sausage (my husband Kyle’s recipe) and use a sharp cheddar.  But feel free to experiment.  Other fun combinations I’ve done include confit fingerling potatoes-leeks-gruyere and roasted corn-habanero pepper-cheddar.  Just keep the veggies and cheese in a roughly equal ration and you’ll be all set.  Even better you can make the quiche up to 4 days in advance.  Just let sit at room temp for 2-3 hours before serving.  Place in a 300 degree oven for 10-15 minutes until warm but not hot and you’ll have an easy and delicious brunch dish!

Ingredients:

Directions

  • Pre-Heat oven to 325 degrees F
  • Mix the sausage and cheddar together
  • place in the pie crust until full.  push down lightly so the filling isn’t higher than the top of the crust.  Any filling not submerged in custard might burn a little
  • slowly pour the custard into the pie.  Allow it to settle and top off until it’s completely full.  I recommend you do this on the tray you intend to bake the quiche on and near the the oven.
  • Place the quiche in the oven and bake for 45-60 minutes or until set.  The best way to tell when the quiche is done is to tap the pie and watch how much it giggles.  It should move but as a single unit, not in waves.
  • Cool the quiche for 4 hours or overnight.  Serves 6 slices.

Quiche Custard

  • 3 large eggs
  • 10 fl ounces heavy cream
  • 3 fl ounces whole milk
  • 1/8 teaspoon freshly grated nutmeg
  • 1/4 teaspoon kosher salt
  • 1/4 teaspoon finely ground black pepper

Directions

  • Place all ingredients in a bowl
  • Whisk smooth.  Reserve in the refrigerator until needed, up to 2 days
  • Whisk before using

This slideshow requires JavaScript.